This is the
Easiest System for Self Installers!
It is simple with NO COMPUTERIZED parts of circuit boards!
We help you every step of the way!
80 - 90% of
our customers install this outdoor wood furnace themselves!
You will
NOT void the warranty by installing the furnace yourself!
Every
furnace comes with a complete detailed 49 page manual with lots
of pictures and diagrams!
If you have any technical questions or
need any help whatsoever, please call 828-683-8055
Installing an outdoor wood furnace can
be broken down simply. The parts needed will usually cost about
$900 if the outdoor furnace is 50 feet from your home, including pre-made
pre-insulated Pex pipe:
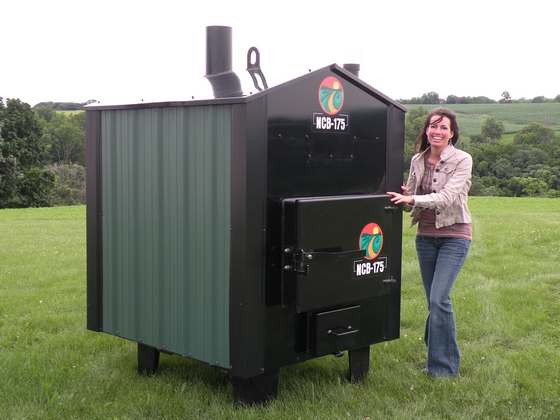
- Pour a 4" thick concrete pad to
support the furnace. The Shaver Pro Series 165 with the
1/2" firebox, weighs 1830 lb. The total weight with
water will be about 3000 lb. It will take only 1/2
yard of concrete for a nice concrete pad (approx 4"
thick), giving you a nice place to stand and load
wood.
You can also use SOLID concrete blocks or railroad ties -
anything that will be stable and support the furnace.
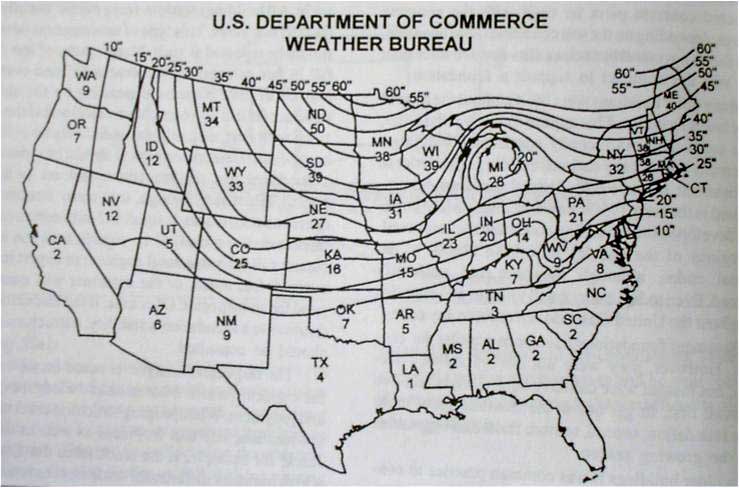
- Dig a trench, making sure it's below
the frost line, to prevent excessive heat loss and freezing.
This is the maximum depth to which frost will penetrate the
ground during the worst of winter. This depth varies from
area to area but is usually just 18" or less in our
area (WNC). See
this frost line map or call your local building
inspector's office.
Putting the Pex lines below the frost line is not mandatory
but it will save a lot of heat loss and wood. The ground
temperature below the frost line is 50-55 degrees, even in
winter, so heat loss is minimal. It's like laying the pipe
on the ground on a spring day. Otherwise, the ground can be
well below freezing!
Trenchers, ditch-witches and small backhoes can be rented
inexpensively allowing you to dig the trench yourself with
little effort, avoiding $40-60 an hour charge from your
local landscaper or septic tank installer.
You will be placing insulated Pex pipe, which has two 1" PEX pipes plus
two
3/4"Pex Pipes (one doubles as a fill line, to top
off the furnace) which are wrapped 4 times with insulation and
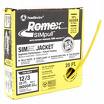
are put inside a 4" drain tile type of pipe. You will also
bury a 12/3 110V wire in a 4" or 6" PVC pipe. The pipe is
placed in a trench, from the outdoor furnace to the house.
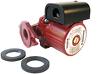
- If you are connecting a hot water
heater you will need another pump ($99), mounted indoors.
This also supplies water to fill your outside furnace! See
info and picture below. A
picture of insulated Pex pipe is below.
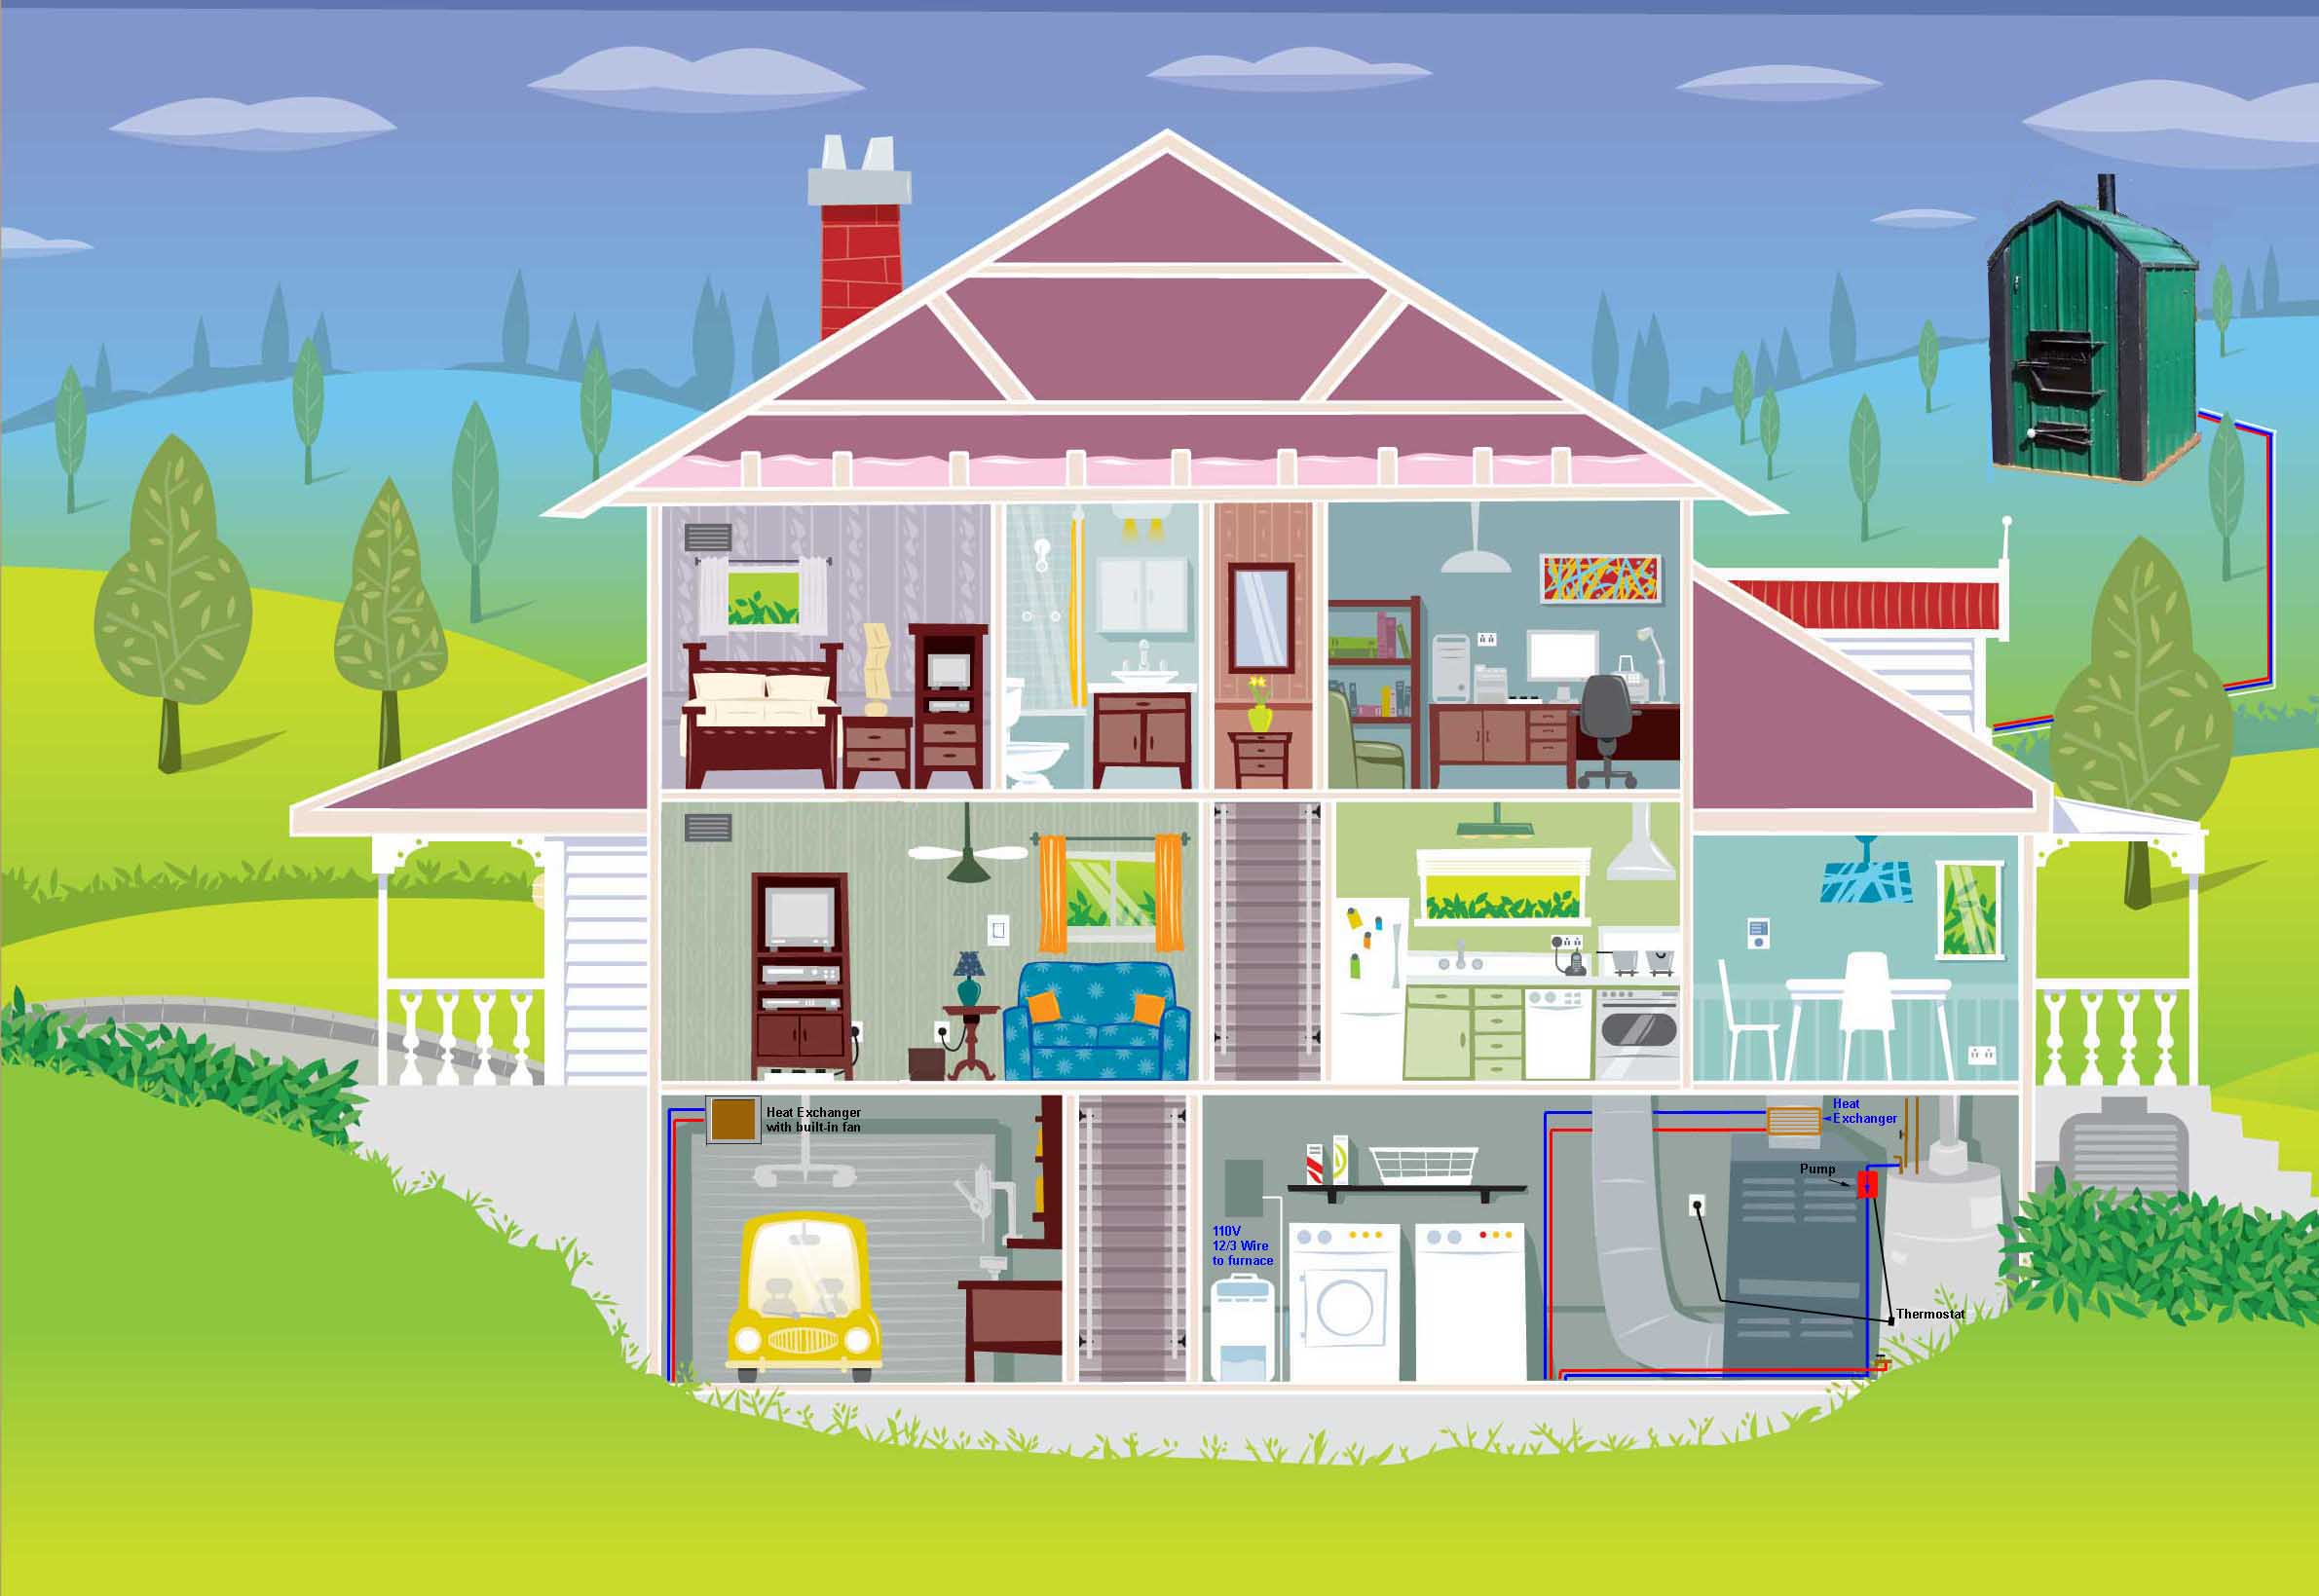
- Install the heat exchanger in the
furnace's output plenum ($150 up - U.S. made). We have
well over 40 different sizes of heat
exchangers to fit your plenum so that little or no metal work
is needed! We can even have a heat exchanger custom
made - in the U.S. - for as little as $202.
(If hooking it to a boiler, you will install a
water-to-water heat exchanger DIAGRAM
HERE).
- Connect the 1" PEX pipe at the
furnace and at the heat exchanger. We use simple
compression fittings or SharkBite™
style fittings,
so a plumber is not needed! SharkBite type fittings are simple
push-on fittings.
- Connect the 3/4" PEX pipe at the
hot water heater, again using simple SharkBite fittings
(push on by hand). No expensive side-arm heat or plate heat
exchanger is needed - since potable hot water is circulated
directly from the hot water heater through the built-in
domestic hot water heat exchanger furnace. It goes back to
your hot water heater already heated up! This can save you
$30-65 a month!
This also saves you about $300 on a side-arm or plate heat
exchanger and tempering or mixing valve. You will
never run out of hot water again!
- Install a new 15A circuit breaker
($8-15) in your breaker box and connect the 110V wire to the
breaker and out at the furnace. You can also get a power
source from an existing wall plug, etc. (You wire up the back
of the furnace including the light - which is shipped in the
firebox, so it doesn't get damaged.)
You can use a 12/3 wire to power up the furnace, so that the
pump runs on demand, instead of 24/7, like with other
furnaces. The third wire in the 12/3 wire is used for the
pump instead of special thermostat wire, so that it only
runs when your furnace fan (or boiler pump) is running.
- Install a simple 2-wire thermostat
($15-20 at Lowe's) and hook it up to your existing
thermostat. This allows the fan to be turned of and on as
heat is needed, without turning on your furnace. This way,
your existing furnace will come on automatically as needed,
as a backup (if you has a snowstorm and couldn't get home,
for example).
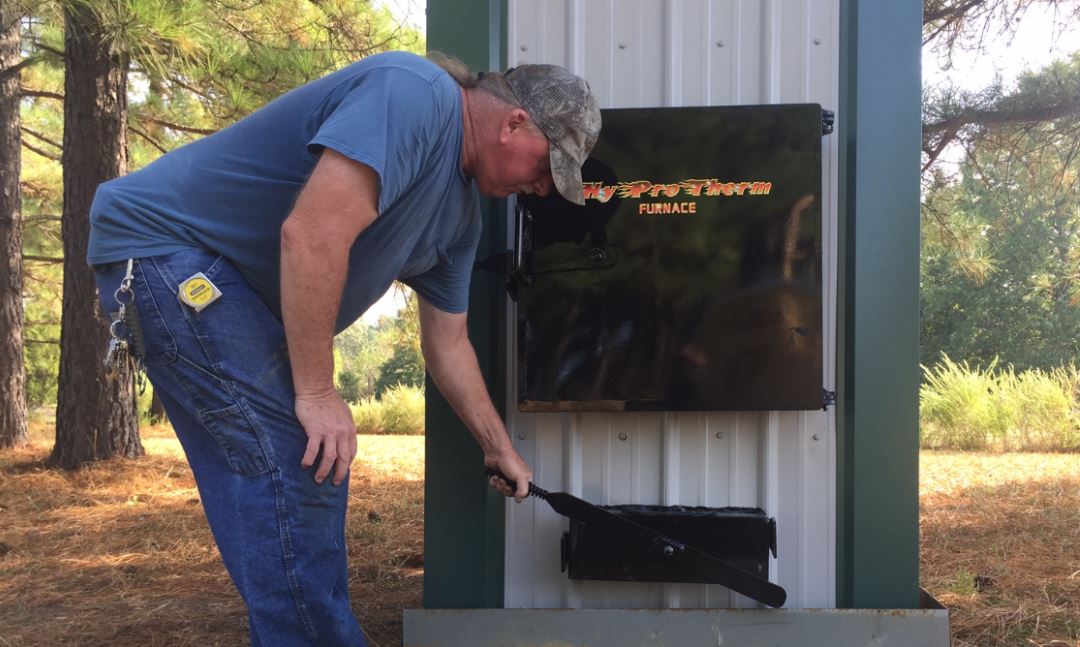
- Fill with water. Start a fire!
- You have started
saving money!
Remember, this
is just an overview. You will get a comprehensive 59 page
manual with lots of pictures and diagrams to make it super easy
for you! Over 80% of our customers install the furnaces
themselves! That's how simple it is.
|
OUTDOOR WOOD FURNACE INSTALLATION
KIT - Typical items needed which can be purchased
locally or our suppliers (828-687-4074).
For one heat exchanger and hot
water hookup - 50 ft.
from furnace
|
| Outside |
|
|
 |
50' of
insulated Pex Pipe- U.S. made (2 x 1" and 2 x 3/4")
$6.75 a foot after a 15% discount. |
$337.50 |
 |
50' 12/3
wire* |
58.00 |
|
|
$395.50 |
 |
1/3 to 1/2
yard concrete or you can use solid concrete papers if
you put gravel and plastic underneath. |
varies
|
|
|
|
| Inside: |
|
|
 |
16 x 18 Heat
Exchanger (100,000 Btu) US-made (just an example)
(Averages $170-220 most applications)
|
168.29
12"x12" is only $100.89 |

 |
Hydrocoil kit (SharkBite type fittings for the
water-to-air heat
exchanger) |
$17.37 elbow/pr
$15.57
straight pr |

 |
Fittings for a plate heat
exchanger (needed for boilers and snow/ice melt systems)
1 1/4 to 1' reducer bushings $13.12/pr
,
1" NFPT straight coupler 16.52/pr |
$29.64 |
 |
Installation
kit includes all fittings, adapters, shut-off valves,
drain, etc. |
61.87 |
 |
Hot water
heater installation
kit includes all Pex fittings, pipe, MPT fittings,
flanges, thermostat
etc. |
66.09 |
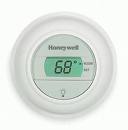 |
2-wire
Thermostat |
16.00 |
|
|
25' 12/2
wire* |
12.00 |
 |
Bare Pex is available for
running the Pex pipe in your home, if it is heated air
space. It can be purchased for as low as $33.00 a 100
foot roll (.33 per foot/ non-barrier) |
3/4" 36˘ foot
1"
57˘ foot |
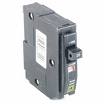 |
110 V 15 Amp
breaker |
20.00 |
|
*Priced at Lowe's on 2/28/09 |
|
|
Sheet metal (Rarely
needed, only if a heat exchanger won't fit your plenum) |
31.00 |
|
Labor
for duct work (only if needed
for heat exchanger to fit) OR We
can have one custom made for less than you think,
saving lots of time and labor!! |
|
May not be the one shown |
If heating
domestic hot water add $92 for a pump.
Our supplier (828-687-4074) also
have a hot water kit that includes a thermostat, pump
flange and all of the fittings for the top and bottom
of the heat exchanger. ($64.19)
|
$89 up |
|
|
averages $459 |
|
|
|
|
|
|
Total: $854 |
|
Pre-insulated Pex
pipe for outdoors - underground.
Only $1-2 a foot more than pipe you make/insulate
yourself!
|
$5.39 a foot* for 2 Pex pipes
insulated in a 4" pipe.
$6.75 a foot* for 4 Pex pipes insulated in a 4"
pipe. |
|
|
*SHAVER CUSTOMERS ONLY |
| |
|
Download
Diagram for Boiler and Hydronic installations
such as for water radiators, water baseboard heaters, etc. (PDF
file - Adobe reader required)
Download
Diagram for hooking up a Pool, Hot Tub or Spa.
Sales and Customer Service for
installation PARTS: 828-687-4074
Building codes (or
lack thereof) often allow a homeowner to do much, it not all of
the work themselves. In other locations a licensed
electrician and plumber may be required to do the actual hookup.
But no tools are needed to plumb it as all the fittings are
push-on by hand fittings.
This usually doesn't preclude you from putting in the concrete
pad, trench, pipe and wiring. Never cover the pipe and wiring
before an inspection, if needed!
Check with your
local Building inspector's office for your frost line level, in
your area.
Backup Power
for your Shaver outdoor wood burning furnace
We sell a battery charger and
inverter combo that is easy to install and use, that will supply
back-up power to you outdoor wood burning furnace!
Utility Power - When
stove sentry is used with a 90 A-HR Marine Battery (purchased
separately), its highly
efficient circuitry can provide up to 8 hours of operation when
you have a power failure.
How it Works:
When electricity is
present the Surefire Stove Sentry charges a battery and surveys
the power line. At the instant that a power failure occurs, the
Surefire Stove Sentry converts the energy stored in the battery
to AC power. This assures operation of the wood furnace or
pellet stove without interruption during the absence of
electricity.
When AC utility
power is restored, the Surefire Stove Sentry reinstates AC
utility power as the prime energy source to operate the wood
furnace or pellet stove. Simultaneously and automatically the
Surefire Stove Sentry commences the recharging of the battery,
to return it to full capacity in preparation for the next power
failure. Cost is $488 and you will need to purchase a
deep-cycle battery.
You can also install
a small solar panel to charge the battery, instead of using line
power and use a less expensive inverter.
Please remember that
you will also need a power supply (backup) for your furnace fan!
A small generator will do the trick.

Click on
picture for a HUGE image. Modem users click HERE.
Scroll to bottom of large picture to see piping, heat
exchangers, hot water hookup and wires in basement.
Picture shown has heated garage in basement, but it could, just
as easily, be a separate garage, shop or apartment.
ALL of these parts are available from us a
great prices and best of all they are high quality parts!
For Pool and Spa Heaters, see
www.outdoorwoodfurnaceboiler.com/outdoor-wood-burning-furnace-pool-heater.htm
Sales and Customer Service for
installation PARTS 828-687-4074 or e-mail:
Many garages or shops use
an air handler like the one below.

CLICK on PICTURES for a BIGGER IMAGE
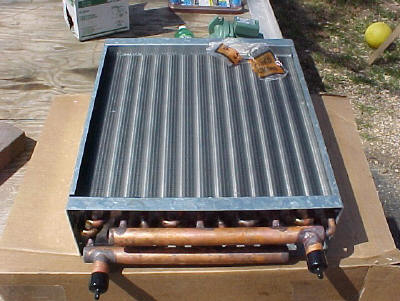
Typical Heat Exchanger that
is installed in the supply plenum
or ductwork (the run that goes to the vents in the different
rooms).

Pre
insulated Pex Pipe for outdoors - underground
What's
nice is that you have 4 Pex lines for heating 2 extra your hot water
heater.
This also gives you a fill or supply line for your outdoor
furnace.
The 4 Pex pipes are surrounded by insulation
- THREE and FIVE
WRAPS of insulation with a black pipe around that.
That's 66%
more insulation than triple wrap pipe!
Heat loss: 3-wrap/1.5
degree and 5-wrap/0.62 degrees

For best results and less heat loss (less wood burnt)
always bury Pre-insulated Pex pipe underground, below
the Frost
Line.

2 x 1"
All pipe wrapped FOUR times with insulation as
opposed to being only wrapped 2 and three times by Our
competitors - and many use Chinese (junk) Pex!
|
|
|
2 x 1" and 2 x 3/4"
$6.75/foot
Pre-insulated Pex pipe for outdoors. Made to be put
underground. Totally insulated with FOUR wraps
high-density polypropylene foil foam insulation.
|
| $5.39/foot |
|
|
Includes 4-wraps of high-density
polypropylene foil foam insulation surrounding the PEX
tubing and placed in a 4” heavy-duty
UV protected drain tile.
|

|
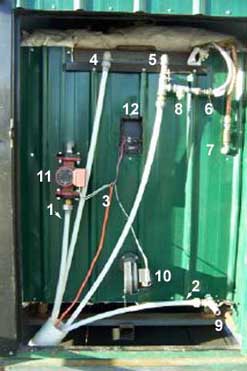
Click on
Picture for a LARGER IMAGE
This shows a single pump hookup.
A port for a 2nd pump is standard and is No Charge.
2nd Pump is $99
Additional ports are $45 set
|
Single
zone setup
with one pump
1. Goes
to house, to heat exchanger.
2. Return from house heat exchanger.
3. 110V to pump, thermostat, and blower
4. Inlet from hot water heater to potable water coil
5. Outlet from potable hot water coil (not seen) -
inside of furnace
6. To manual fill valve on front of furnace
7. Water supply to furnace from manual valve in front
of furnace
8. Optional outdoor hot water supply. Great for steam
cleaning!
9. Drain
10.Blower/Fan to fuel fire
11.Circulating Pump
12.Thermostat to control fan
|
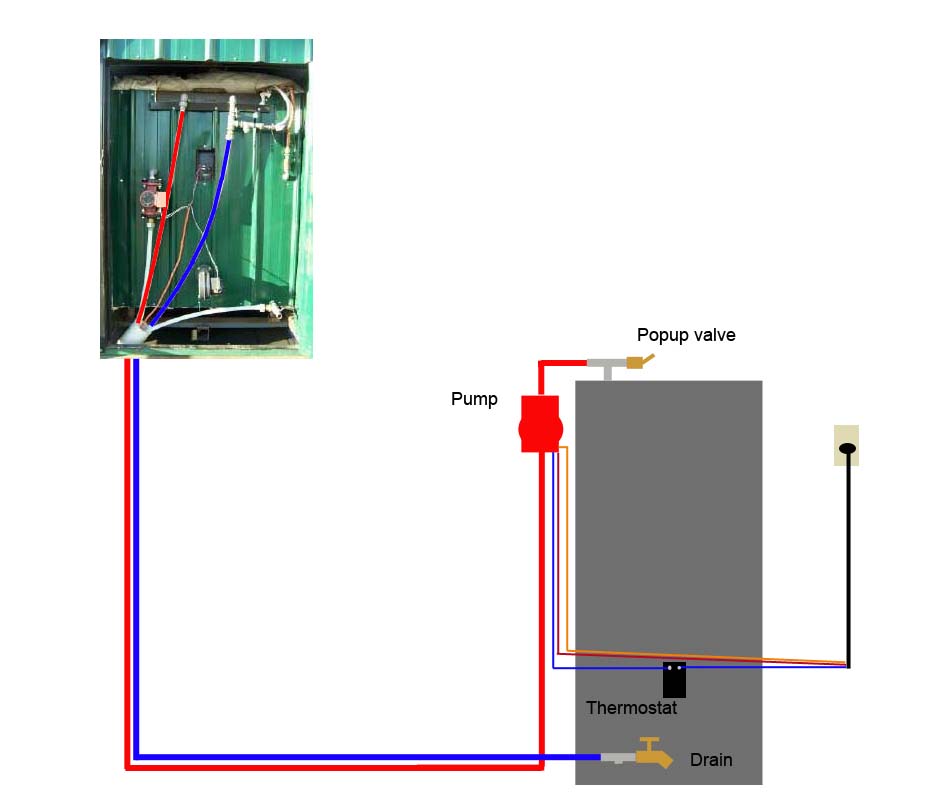
| Hooking up the Hot Water Heater
You can heat all the hot
water you need and store it in your existing hot water
tank, just like you water heater does no, except that
it will be free heat! This will save most people
$35-$65 a month!
With an electric hot water
heater, we recommend that you remove the pop-up valve
and replace it with a 3/4" nipple and a T for
your incoming water. Put the pop-up valve back on one
side of the T and the circulating pump on the other.
Remove the drain and do
the same, putting in a T with the drain on one side
and the outgoing water (Pex Pipe) on the other.
Put a surface mount
thermostat beside, above or below the bottom element.
About $5 - 8 at your local hardware store. Wire it so
that 110V goes to one side of the thermostat and the
other side is wired to the pump. Common goes straight
to the pump, as well as a ground wire.
You just saved $200 for a
less efficient side-arm or plate heat exchanger! You
can still use the heater as normal. Simply turn the
thermostat down lower on the hot water heater than on
the thermostat just installed, or turn off your
breaker for the pump (or unplug it).

Gas Hot Water Heater
For a gas heater, there is usually a plate than can
be removed to gain access to the tank itself. Simply
mount the thermostat on the tank and follow the other
instructions for water hookup above.

Click on diagram above for a
bigger picture
Be sure to click on lower right of diagram after
downloading,
to make it bigger, if it appears too small..
|

Outdoor Furnace Dimensions


Recommended Dimensions for Concrete Pad
Ignore the 45 degree angle
shown, if you are getting pre-made insulated Pex from us!
Shaver Pro Series 140 - 48" x 114" Suggested pad
size
Shaver Pro
Series 165* - 48" x 120"
Suggested pad size
Shaver Pro Series 250 - 48" x 136" Suggested pad
size
Shaver Pro Series 290 - 48" x 144" Suggested pad
size
Shaver Pro Series 340 - 48" x 154" Suggested pad
size

You only need the 45 degree angle when you are making insulated
Pex yourself inside a Pex pipe.

Shaver Pro Series 165 model holds 170 gallons
of water..
Other models have up to 300 gallons of water.
|


